- PolyJet Legacy Printers
- Alaris30 V1
- Connex260
- Connex350/500
- Eden250
- Eden260
- Eden260V/VS
- Eden330
- Eden350
- Eden350V/500V
- J700 & J720 Dental
- J750/J735
- J750 Digital Anatomy
- Objet24/30 V2 Family
- Objet24/30 V3 Family
- Objet30 V5 Pro & Prime
- Objet260 Connex 1-2-3
- Objet260 Dental & Dental Selection
- Objet350/500 Connex 1-2-3
- Objet1000 Plus
- PolyJet Materials
- Agilus30 family
- Biocompatible
- Biocompatible Clear MED610
- Dental Materials
- Dental TrueDent Materials
- Dental TrueDent-D Materials
- Digital ABS Plus
- DraftGrey
- Elastico Clear/Black
- High Temperature
- MED610-DSG
- PolyJet Support
- Rigur & Durus
- Tango
- PolyJet ToughONE™
- Transparent
- Vero ContactClear
- Vero Family
- Veroflex
- VeroUltra Opaque
- Vivid Colors
- Stereolithography Materials
- Somos® 9120™
- Somos® BioClear™
- Somos® DMX SL™ 100
- Somos® Element™
- Somos® EvoLVe™ 128
- Somos® GP Plus™ 14122
- Somos® Momentum™
- Somos® NeXt™
- Somos® PerFORM™
- Somos® PerFORM Reflect™
- Somos® ProtoGen™ 18420
- Somos® ProtoTherm™ 12120
- Somos® Taurus™
- Somos® WaterClear® Ultra 10122
- Somos® WaterShed® AF
- Somos® WaterShed® Black
- Somos® WaterShed® XC 11122
- Somos® WaterShed® XC+
Stratasys H350 – Customer Onboarding & Setup Path
Welcome to your H350 onboarding journey
Get up and running with your Stratasys H350 quickly and confidently. Follow these steps for site preparation, software setup, installation, and training. Accompanying these guidelines are key resources, guides, and videos to support your success.
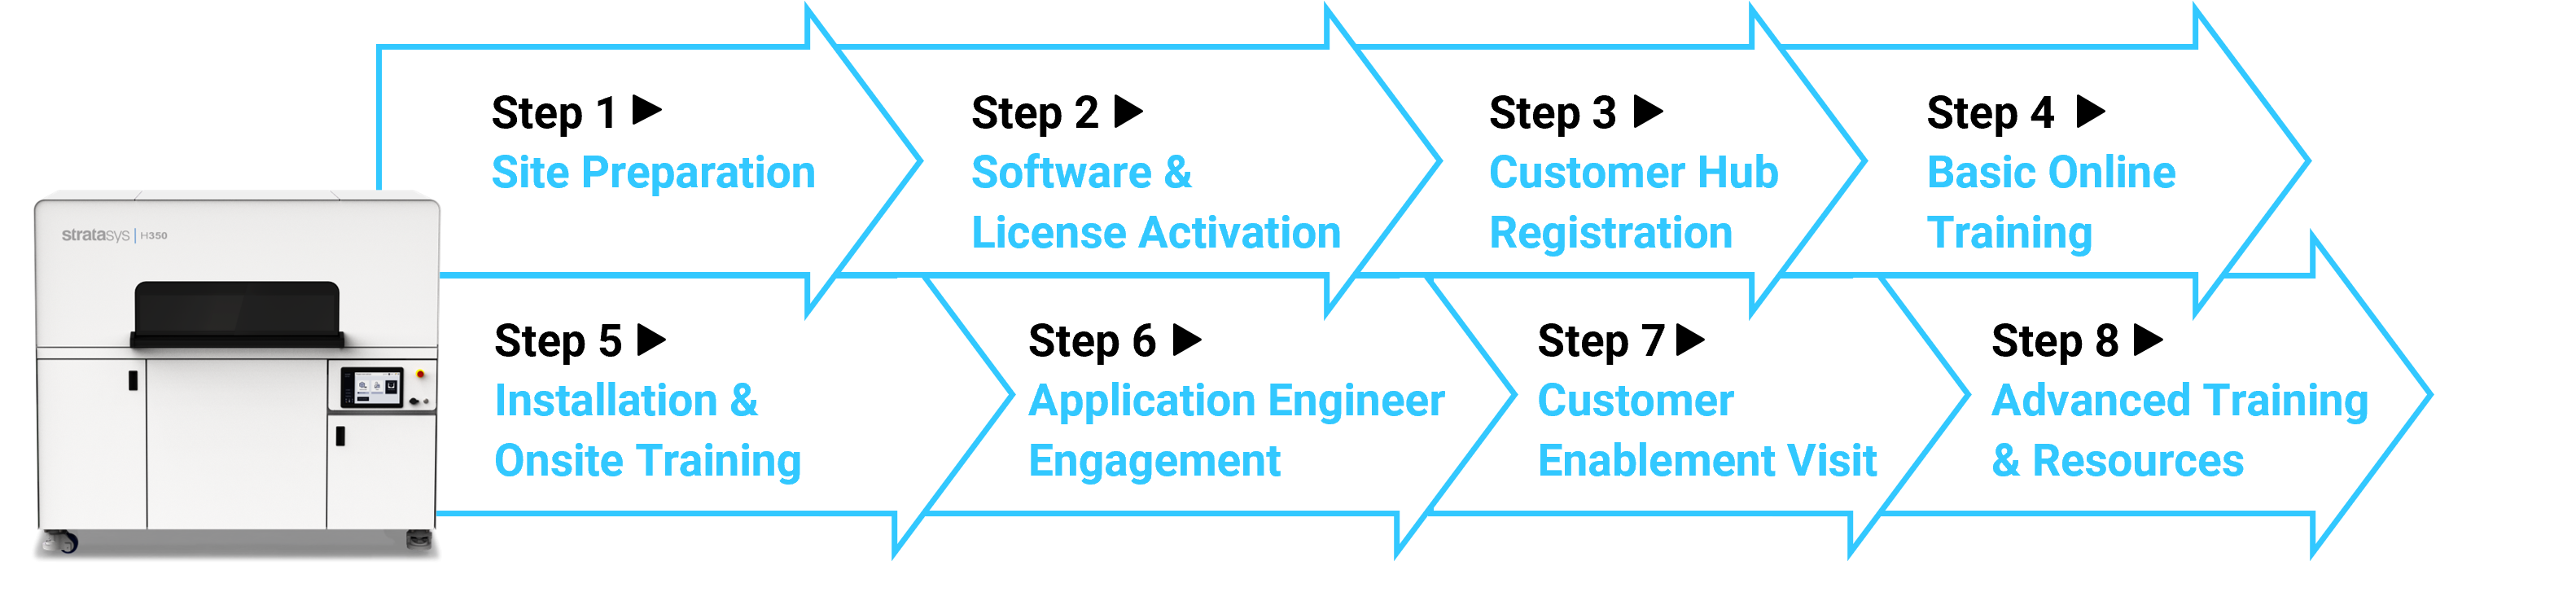
► Step 1: Site PreparationGoal: Ensure your site is ready before delivery. Resources:
Note: Please make sure to send the site preparation checklist to Stratasys or your partner. |
► Step 2: Software & License ActivationGoal: Before printing, set up your GrabCAD Print account and activate your workstation software.
|
► Step 3: Customer Hub RegistrationGoal: Access materials, training, and consumables. Benefits:
|
► Step 4: Basic Online TrainingGoal: As an operator, familiarize yourself with the printer's interface and workflows.
Save the H350 YouTube Playlist as a favorite so you can easily access video guidance whenever you need it! |
► Step 5: Installation & Onsite TrainingGoal: Ensure the system is installed and your team is confident in daily operation. The process includes:
|
► Step 6: Remote Application TrainingGoal: Receive guidance on creating applications on a call with an application engineer. What is covered?
|
► Step 7: Customer Enablement Visit (Optional)Goal: With a two-day on-site visit by an application engineer accelerate the learning through sharing best practices and tips & tricks across the entire workflow - from initial design to final part production. Key topics and activities:
|
► Step 8: Advanced Training & ResourcesGoal: Continue building expertise. Resources:
|