- PolyJet Legacy Printers
- Alaris30 V1
- Connex260
- Connex350/500
- Eden250
- Eden260
- Eden260V/VS
- Eden330
- Eden350
- Eden350V/500V
- J700 & J720 Dental
- J750/J735
- J750 Digital Anatomy
- Objet24/30 V2 Family
- Objet24/30 V3 Family
- Objet30 V5 Pro & Prime
- Objet260 Connex 1-2-3
- Objet260 Dental & Dental Selection
- Objet350/500 Connex 1-2-3
- Objet1000 Plus
- PolyJet Materials
- Agilus30 family
- Biocompatible
- Biocompatible Clear MED610
- Dental Materials
- Dental TrueDent Materials
- Dental TrueDent-D Materials
- Digital ABS Plus
- DraftGrey
- Elastico Clear/Black
- High Temperature
- PolyJet Support
- Rigur & Durus
- Tango
- ToughONE™
- MED610-DSG
- Transparent
- Vero ContactClear
- Vero Family
- Veroflex
- VeroUltra Opaque
- Vivid Colors
- Stereolithography Materials
- Somos® 9120™
- Somos® BioClear™
- Somos® DMX SL™ 100
- Somos® Element™
- Somos® EvoLVe™ 128
- Somos® GP Plus™ 14122
- Somos® Momentum™
- Somos® NeXt™
- Somos® PerFORM™
- Somos® PerFORM Reflect™
- Somos® ProtoGen™ 18420
- Somos® ProtoTherm™ 12120
- Somos® Taurus™
- Somos® WaterClear® Ultra 10122
- Somos® WaterShed® AF
- Somos® WaterShed® Black
- Somos® WaterShed® XC 11122
- Somos® WaterShed® XC+
Setting Up GrabCAD Analyze – Installation
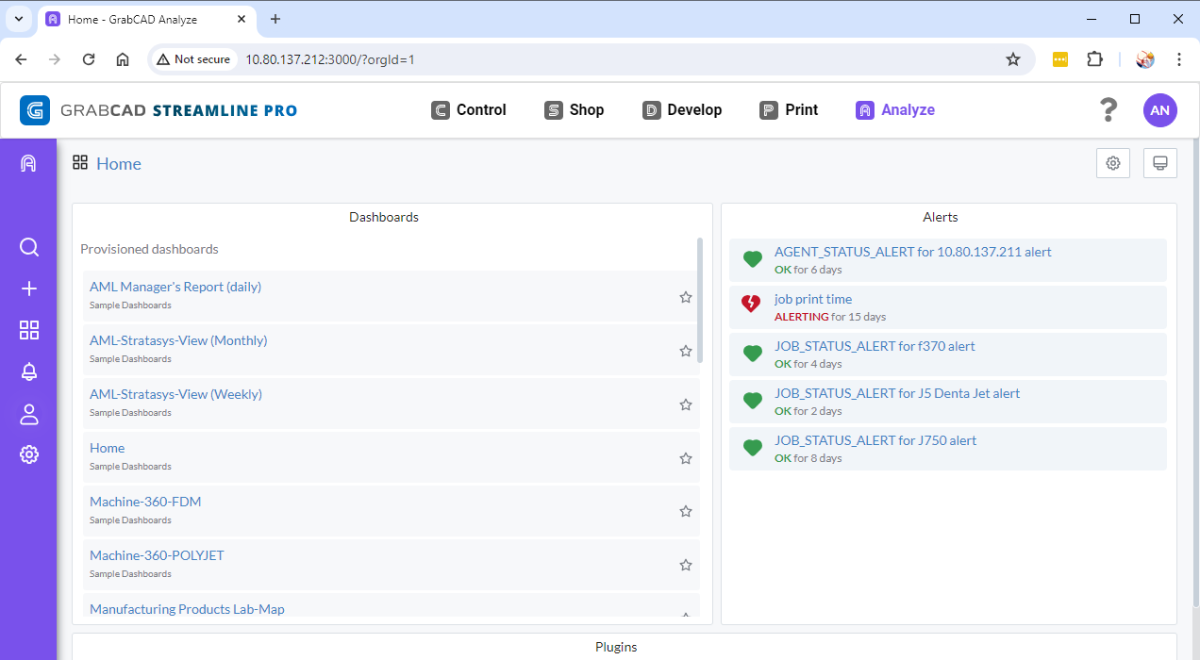
This is the installation guide for GrabCAD Analyze, a powerful tool offering real-time analytics and alerts for your Stratasys 3D printers. GrabCAD Analyze provides various dashboards, each presenting data in unique formats.
The installation of GrabCAD Analyze consists of two components which are installed separately: GrabCAD Analyze Agent and GrabCAD Analyze Server. The Agent monitors the printers and delivers the data to the Server, which stores the data and hosts the Analyze application. The Analyze app is accessed via a web browser and URL, but it's not a website. Instead, it's an application hosted locally by the Analyze Server, and you can only access it while on the local network.
Installing GrabCAD Analyze has three steps:
- Installing Analyze Agent
- Installing Analyze Server and necessary prerequisite software
- Post-installation steps and launching
Note: It is recommended to install both the Agent and the Server on one computer which meets the system requirements. However, you may also install them on separate machines. See the "Alternate method" section of the system requirements and, if applicable, the Linux method below.
GrabCAD Analyze Agent Installation
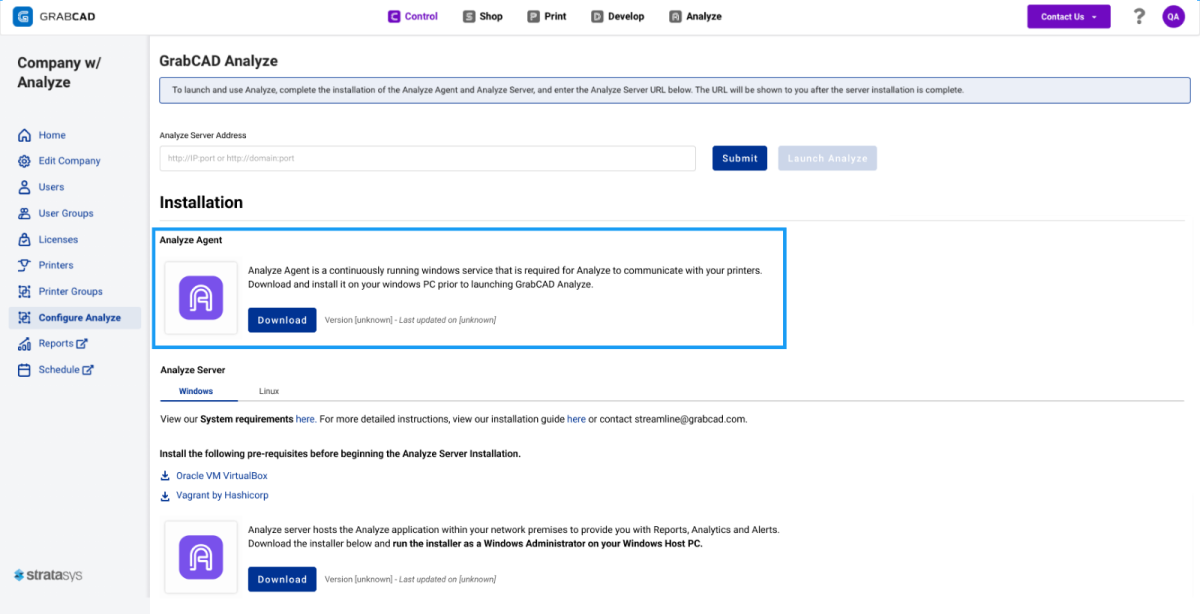
- Log into GrabCAD Control and go to the Configure Analyze page. (You must be a company admin to access GrabCAD Control.)
-
Download the Analyze Agent Installer, and if necessary, transfer the file to the computer where you will install it.
-
Run and complete the installation of "GrabCADAnalyzeAgentInstaller.exe".
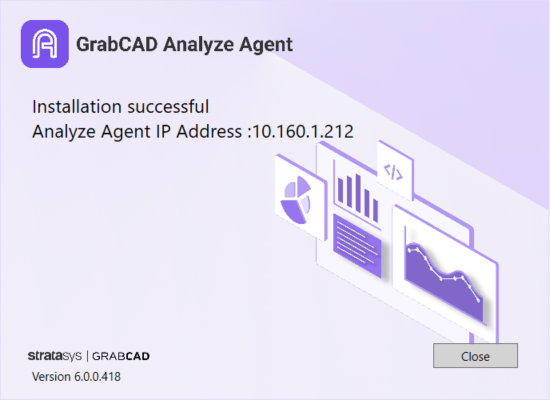
- Note down the IP address displayed in the completion screen (example above). You will need the Agent IP address along with port 5010, later in the Analyze Server, to connect your printers.
Upon completion, you can launch the Windows Task Manager with Ctrl+Alt+Del and ensure the “GrabCAD Analyze Agent Windows Service” is running.
GrabCAD Analyze Server installation:
GrabCAD Analyze Server is natively a Linux application. As such, the Windows installer deploys a virtual Linux machine with a disk image that includes the Analyze Server. Due to the nature of this installation method, some pre-requisite software is required to make sure everything functions smoothly and you will require Administrative privileges on the Windows computer. However, because this method allows you to install both Analyze Server and Analyze agent on the same computer, it is the recommended method of installing GrabCAD Analyze.
Alternately, you can choose to install the native Linux version of Analyze Server. The performance of the application will be the same as the Windows method, so this method is only recommended if you already have a Linux computer available which meets the "alternate method" of the system requirements.
Installing GrabCAD Analyze Server on a Windows machine:
The following pre-requisites must be installed before installing the Analyze Server
Oracle VM VirtualBox
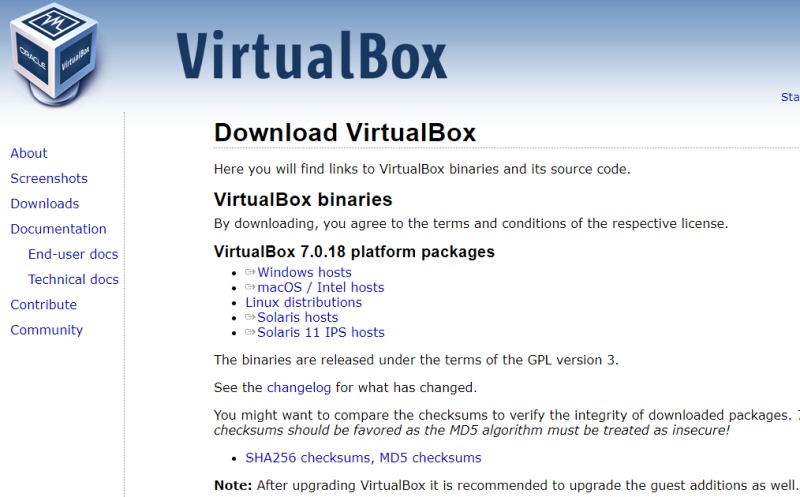
GrabCAD Analyze Server is a Linux-based application, and in order to run on Windows, a virtual Linux machine is required. The Windows installer for GrabCAD Analyze Server will set things up in VirtualBox automatically, so all you need to do is to download the installer for Windows hosts from the following link and install it: VirtualBox Download.
Vagrant by Hashicorp
Vagrant is required to run the installation scripts needed for GrabCAD Analyze. Download and install the AMD64 version of Vagrant for Windows from the following link: Vagrant Download. A restart of your computer is required after installing Vagrant, before you begin the Analyze Server installation.
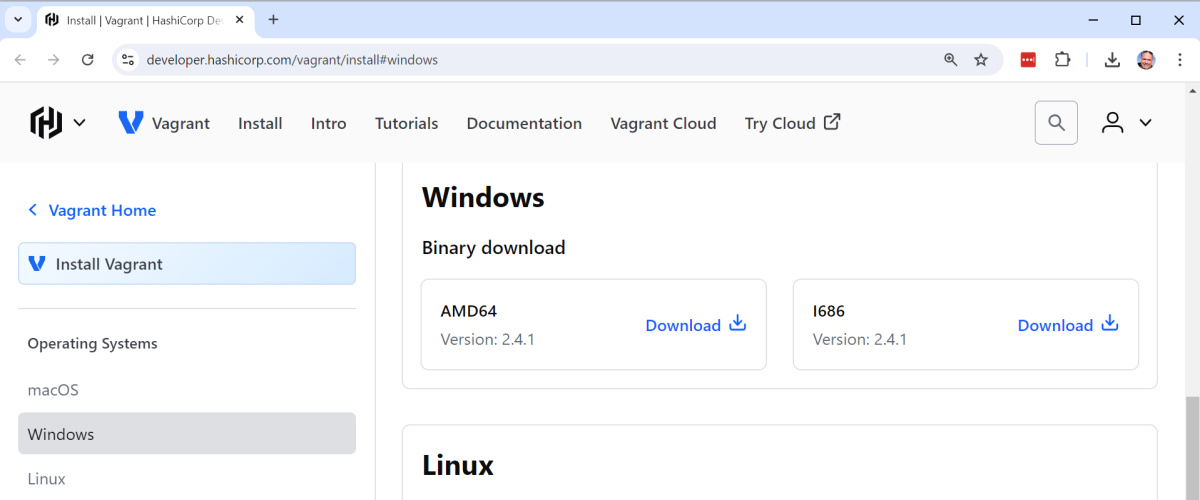
After installing VirtualBox and Vagrant, the GrabCAD Analyze Server can be installed
- Log into GrabCAD Control and go to the Configure Analyze page. (You must be a company admin to access GrabCAD Control.)
-
Download the Analyze Server Installer, and if necessary, transfer the file to the computer where you will install it.
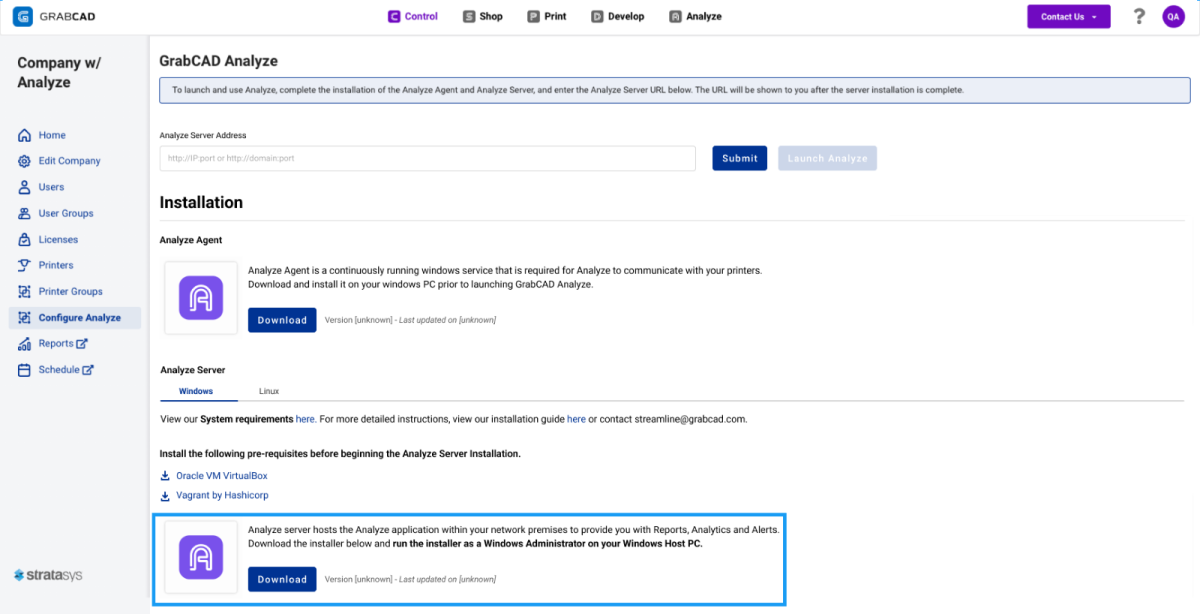
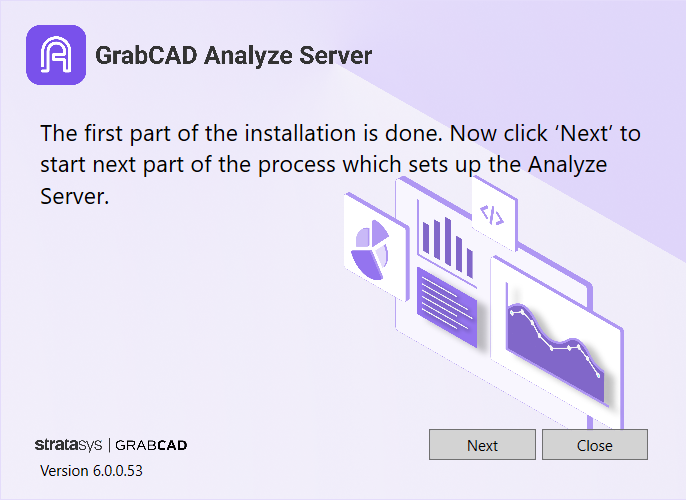
- After downloading the .exe file, DO NOT DOUBLE-CLICK TO RUN THE FILE. Instead, please right-click on the installer and choose Run as administrator and follow the screens to complete the installation. This installation occurs in 2 stages. After agreeing to the EULA (end user license agreement), you will complete the first stage and be prompted to click next.
-
Click next, which launches a new window, to install the remaining Analyze components. This step will take a few minutes.
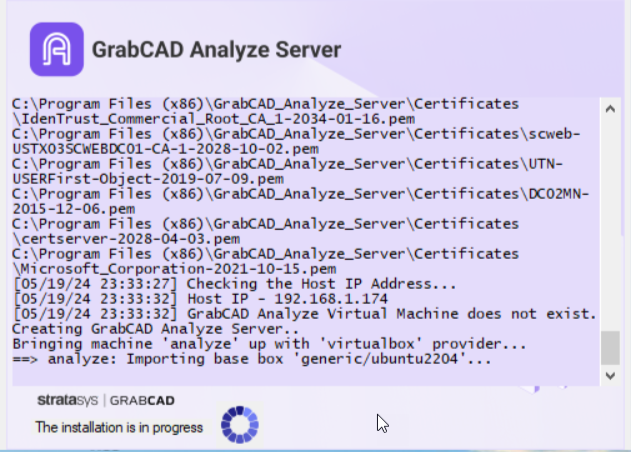
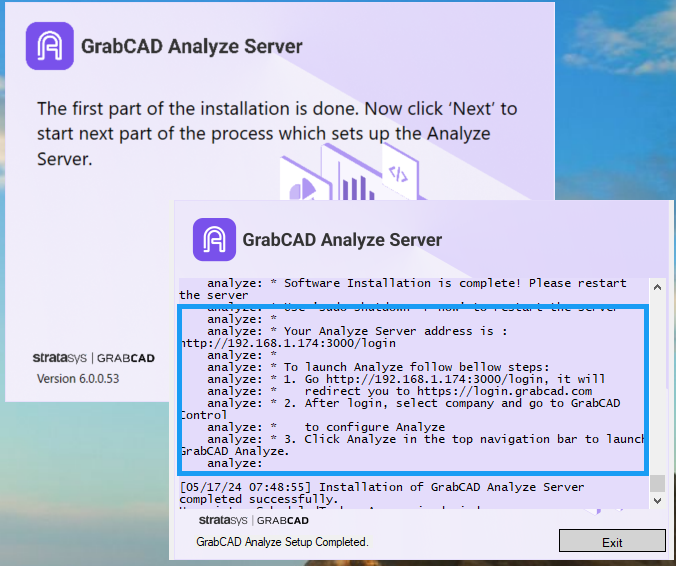
- Before you close the window, copy the Analyze Server address from the screen as shown below. You will need it in the post-install steps.
Please continue following this guide in the following section: Post-Installation steps and launching
Alternate method — Installing GrabCAD Analyze Server on a Linux System:
The following installation instructions are for installing Server on a Linux system directly, instead of on a Windows machine. If you already completed the Windows installation instructions above, please skip ahead to the next section: Post-Installation steps and launching.
The images below are of an Ubuntu Server terminal.
- Type “ip link” in the command line to obtain the Linux system’s network interface name.
-
the interface name highlighted is yellow

-
the interface name highlighted is yellow
-
Type “ip address” in the command line to obtain the IP address associated with the network interface

- Next, you will need to transfer the installation file downloaded from the Configure Analyze page in GrabCAD Control to the Linux system. You can use either plain Secure Copy (SCP) from the command line or use an interactive application on your PC, like WinSCP (which you can download here). Virtual machine management tools may also provide built-in file transfer tools. In this guide, we will use WinSCP:
-
Download the GrabCAD Analyze Installer from the Linux tab in GrabCAD Control.
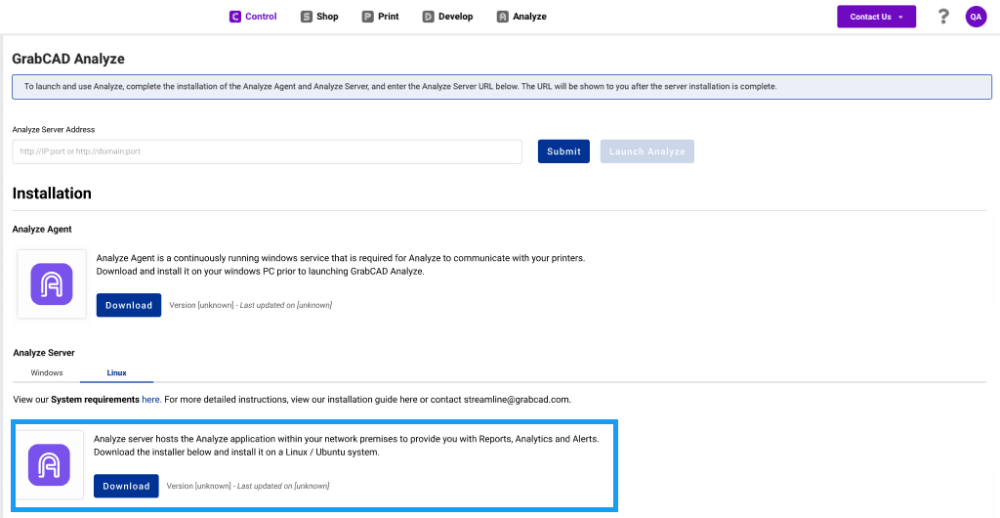
- Install WinSCP (it shouldn’t require admin rights).
- When you launch it, you should see the screen below. Enter the AnalyzeServer IP address. Don’t change the port.
-
Enter your Linux systems username and password.
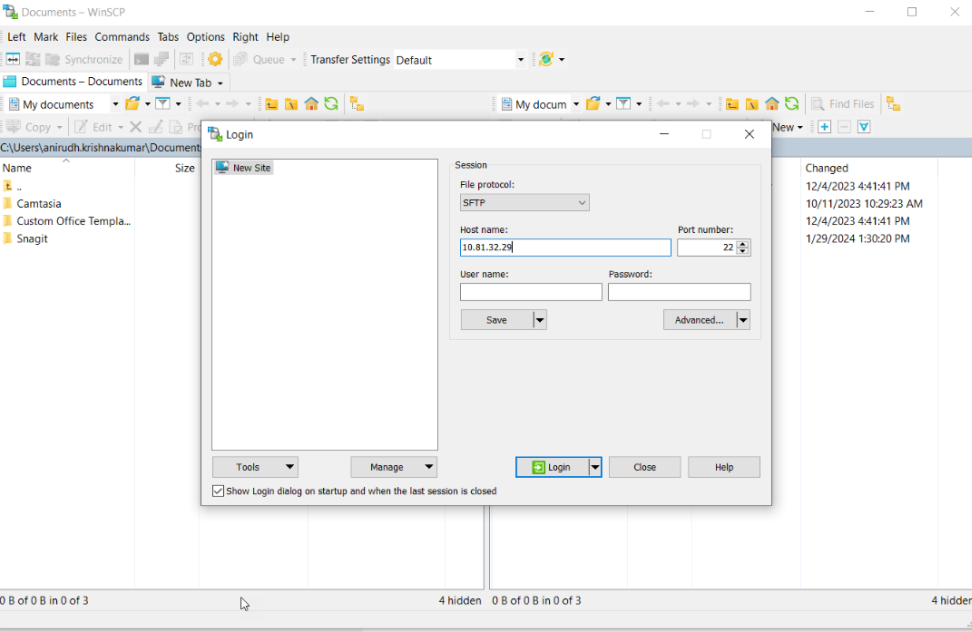
- Click Yes in the following screen to host the SSH key locally.
-
Download the GrabCAD Analyze Installer from the Linux tab in GrabCAD Control.
- Now that you have connected your PC to the Linux system, you will see your computer’s files on the left and the Linux server files on the right of the WinSCP application.
- Find the GrabCAD Analyze Server Installer on your PC, and simply drag it to the Linux system.
- After the file has been transferred, you will no longer need WinSCP or other SSH capabilities for this installation. However, if there is an upgrade, this process needs to be repeated.
- Once the installer is copied to Linux system, you can begin the Analyze Server installation. In the Linux system and enter the following commands sequentially to begin and complete the installation. At any point, you can abort the installation by typing Ctrl+C.
- This installation assumes the software has been copied to the /home/<username> directory.
-
Become the ‘root’ user for the install and move to the directory where the install bundle has been copied. Enter the following commands sequentially. You will be asked to enter the password after “bash”
$ sudo bash# cd /tmp# ls *.gzGrabCADAnalyzeServerInstaller-<version>.gz
-
Unpack the software bundle. This will extract the tar.gz file.
# tar xvzmf GrabCADAnalyzeServerInstaller-<version>.gz
-
Install a prerequisite package ahead of time.
# sudo apt install net-tools
-
Enter the following commands to change the directory and run the install. The install.log file can be retrieved using WinSCP in case installer problems need to be diagnosed.
# cd msbundle# sudo ./install.sh 2>&1 | tee install-$(date -u +'%Y-%m-%dT%H:%M:%SZ').logPRESS ENTER TO CONTINUE WITH INSTALL;
- Pressing ENTER will ask you to accept Stratasys License agreement. After pressing (y) you will be prompted with series of installation questions.
- Select installation or upgrade:
- For fresh installation select option 1) Install GrabCAD Analyze Server
-
If you are upgrading existing Analyze software, select option 2) Upgrade GrabCAD Analyze Server
1) Install GrabCAD Analyze Server2) Upgrade GrabCAD Analyze ServerEnter installation package number [1]:
- Next, the installer will report the network interface it will use. By default, it selects “eth0” or “enp0s3”.
- After all the questions, an overview of settings is presented. Press “Enter” to start the actual installation.
- The unpacking and installing of GrabCAD Analyze server will start and complete in about 8-10 minutes. If it takes longer than 15 minutes, please click Ctrl+C and start over.
-
After the installation is complete. Please restart the server.
# sudo shutdown –r now
The Analyze server is now installed.
Post-installation steps
Once the Analyze Agent and Analyze Server are successfully installed, you’re ready to launch the Analyze application.
Add the Analyze Server address in GrabCAD Control:
The IP address of the computer running the GrabCAD Analyze Server must be obtained. You will have noted it down after the completion of installation, or you can use the command prompt in Windows to find it. If the IP address of the Server computer is 192.168.123.48, the Analyze Server address would look like this: http://192.168.123.48:3000/login

In addition to port 3000 all other ports that need to be open from all client computers that will access the Analyze Server can be found here Requirements-for-web-applications.
After entering the address, click Launch Analyze and wait for the page to load. The first time launch of GrabCAD Analyze may take a few minutes.
Optional: Verify that the Analyze Server to start automatically after Windows restarts:
It is recommended to keep the Analyze Server and Agent always running to ensure there is no loss of printer data in the Analyze dashboards. The Analyze Server installation configures Windows to to automatically restart the virtual machine and the Analyze Server in the event of a Windows update, or scheduled restart. To prevent any downtime, it is important to verify that the installation successfully updated the Windows settings:
- Launch the Task Scheduler app on Windows. You can find it by searching Task Scheduler near the Start button.
- Navigate to Task Scheduler Library in the left panel.
-
In the left pane of the Task Scheduler window, expand the "Task Scheduler Library" folder.
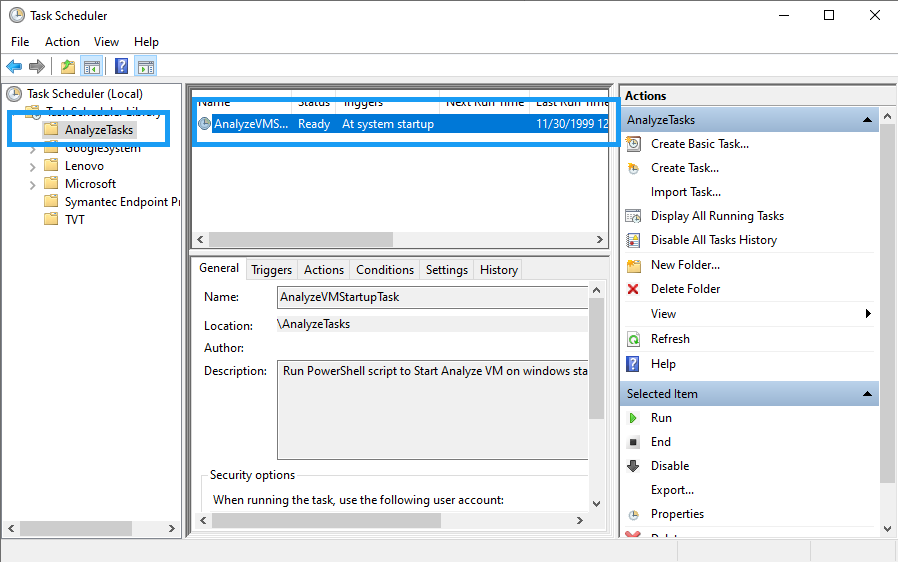
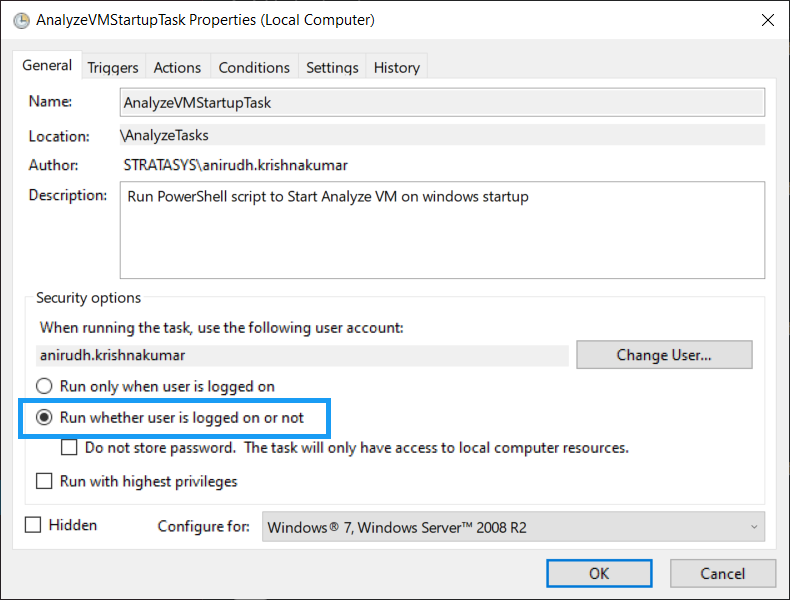
- Locate AnalyzeVMStartupTasks and double-click on "AnalyzeVMStartupTasks" to open its properties.
- In the General tab, verify the option "Run whether user is logged on or not" is selected. If not, you will require administrator privileges to update the setting.
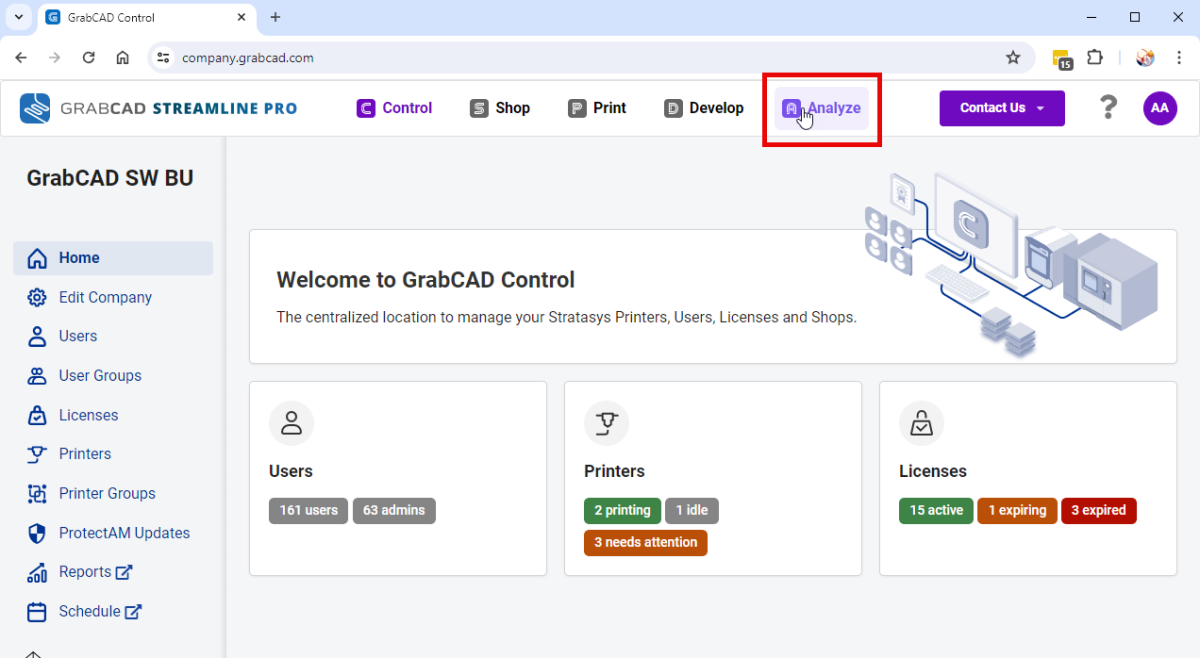
You and all the users in your company can now go to login.grabcad.com, login and go to GrabCAD Analyze directly from the login screen, or from GrabCAD Control or GrabCAD Shop using the top navigation. All GrabCAD Control users in your company will have an administrator role in Analyze as well, everyone else will have an "editor" role.
You can now setup your Analyze application, add your printers, and explore dashboards as shown in this article.

