
Completing the Head Replacement Procedure
After replacing the print head(s), continue in the wizard, as follows:
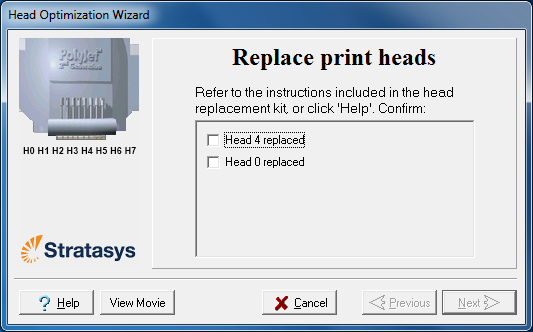
| 1. | In the Replace print heads screen, select the check box to confirm that you have replaced the head(s), and click . |
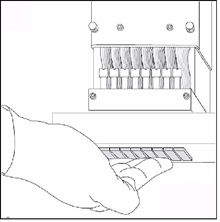
| 2. | With your fingers, make sure that the new head is level and even with the other heads. |
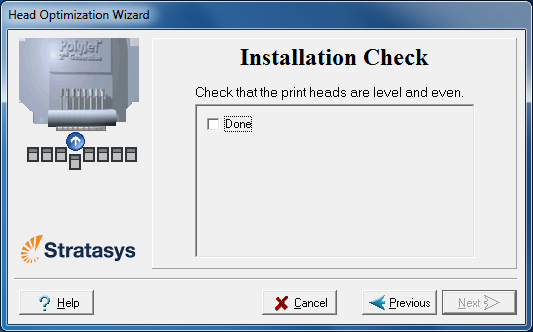
| 3. | Confirm that the heads are level by selecting the check box in the following wizard screen, and click . |
| 4. | In the next wizard screen, confirm that you have removed all tools and objects from the printer. |
![]()
| 5. | Close the printer doors. |
The wizard continues by heating the heads, then filling and purging them. If there are no installation problems, the optimization procedure begins, to calibrate the print heads to the best working configuration—see Optimizing (Calibrating) Print Heads.
If installation problems are detected, the wizard alerts you and instructs you how to continue (see
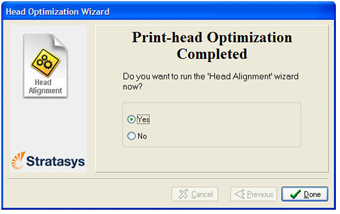
| 6. | After replacing print heads, you should check the head alignment before using the printer to produce models. In the final wizard screen: |
| • | Select and click to open the Head Alignment wizard (see Aligning the Print Heads). |
| • | Select and click to align the heads at another time. |
| Questions, comments, suggestions? c-support@stratasys.com | Legal | © Stratasys |