
Cleaning the Print Heads, Roller and Wiper
Regular inspection and cleaning of the orifice plates on the bottom of the print heads prevents print nozzles from clogging. Cleaning the roller and wiper are also important for maintaining quality printing. A wizard adjusts printer components to enable access to these key areas, and it guides you through the cleaning procedure. To maintain the printer in optimum condition, run the wizard after every print job, when you remove the model from the build tray. This procedure takes about 20 minutes.
To clean the print heads, roller and wiper:
|
•
|
90% isopropanol (IPA—isopropyl alcohol) or ethanol (ethyl alcohol) |
|
•
|
disposable cleaning gloves
|
|
•
|
a supplied cleaning cloth or equivalent
|
|
2.
|
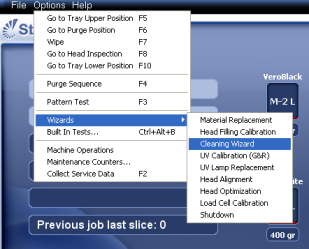
Start the Cleaning wizard from the Options menu. |
|
3.
|
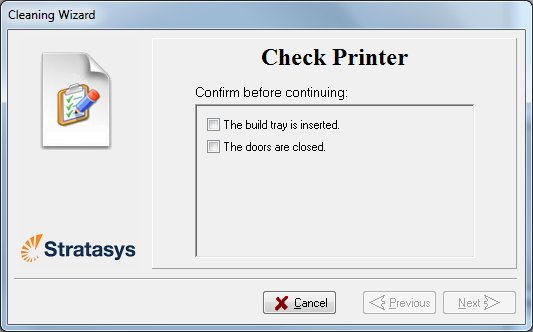
Make sure that the build tray is in the printer, and close the printer doors. Confirm this in the wizard screen and click Next. |
The printer moves components to the cleaning position.
|
4.
|
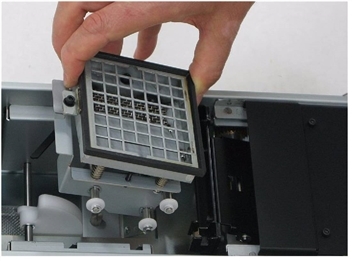
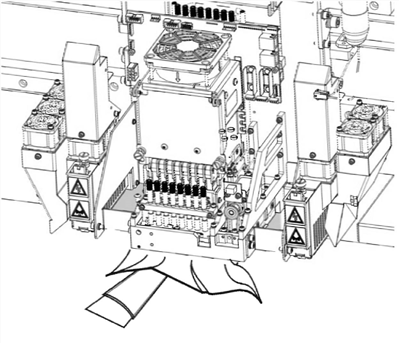
When the following screen appears, open the printer. |
The print head orifice plates (bottom surface) may be hot. Do not touch them with your bare hands, and proceed with caution.
|
5.
|
Place the mirror on the build tray.
|
Uncured printing material on the print heads might cause skin irritation. Use disposable cleaning gloves to protect your hands.
|
7.
|
Soak the cleaning cloth with alcohol. |
|
8.
|
Clean the orifice plates, with a back-and-forth motion. Use the mirror to make sure that you have removed all of the residue material. |
|
9.
|
After cleaning the print heads, clean the entire roller surface, by rotating it as you clean.
|
|
10.
|
Clean the glass lens on the UV lamps.
|
|
11.
|
Open the service window on the left side of the printer to access the wiper.
|
|
12.
|
Using a generous amount of alcohol on the cleaning cloth, remove any material remaining on the wiper and the surrounding area.
|
|
13.
|
Remove any pieces of waste material collected in the purge unit. If necessary, remove the waste collector to clean it. Wipe the rubber seal. |
Note: When returning the waste collector to the purge unit, make sure to insert it as shown.
If the wiper is scratched, torn or worn, or if you cannot clean it completely, replace it.
a. Grasp it and pull it up and out of its bracket.
b. Insert the new wiper blade, making sure that it is straight and secured well on both sides.
|
15.
|
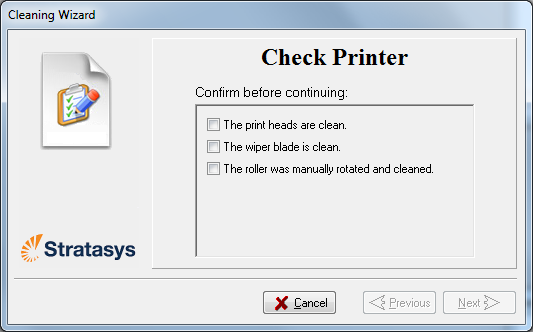
When you have finished cleaning, select the confirmation check boxes in the wizard screen and click Next. |
|
16.
|
Remove the cleaning materials from the printer and close the printer doors. |
|
17.
|
Select the confirmation check boxes in the wizard screen and click Next. |
The head-purge cycle begins. When this is complete, the final wizard screen appears.
|
18.
|
Click Done to close the wizard. |
 Related Topics