
Cleaning the Roller Waste Collector and Inspecting the Roller Scraper
The roller waste collector removes waste material scraped from the roller. Suction removes this waste to the printer’s waste container.
This assembly should be cleaned weekly to prevent a blockage in the tubes leading to the waste container, so that waste material does not overflow into the printer.
To clean the roller waste collector:
|
•
|
M2.5 and M2 Hex (Allen) keys |
|
•
|
disposable cleaning gloves |
|
•
|
90% isopropanol (IPA—isopropyl alcohol) or ethanol (ethyl alcohol) |
|
•
|
cotton swabs (Q-tips or similar) |
|
3.
|
Remove the right UV-lamp assembly: |
a. Disconnect the UV power cable and the fan power cable.
b. Remove the screw that secures the right UV lamp, and then pull and lift up the UV lamp.
|
4.
|
Remove the five (5) screws that secure the UV bracket to the print block and remove the bracket. |
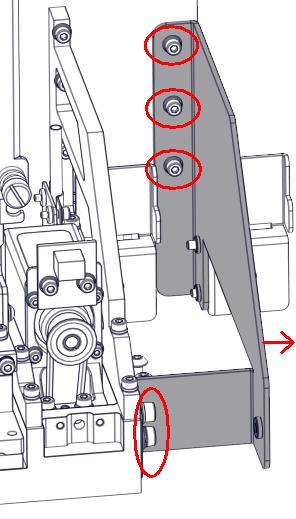
Removing the UV bracket
|
5.
|
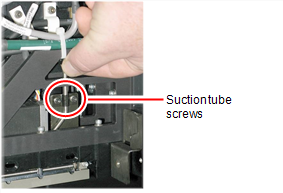
Loosen the two screws securing the suction tube on the print block. |
|
6.
|
Lift the suction tube to secure it in a raised position. |
|
7.
|
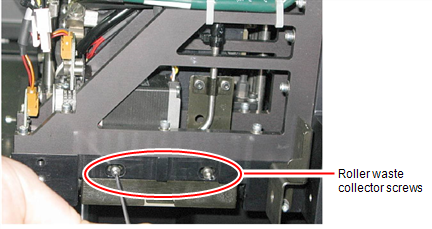
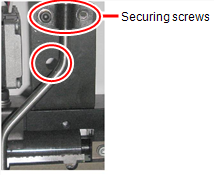
Remove the two screws securing the covering of the roller waste collector and remove it. |
Be very careful to save the covering screws. These are special screws; if they are lost, you need to order replacements.
|
8.
|
Remove the covering by pulling it out, and then lower it. |
|
9.
|
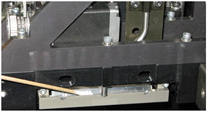
Clean the roller waste collector and the scraper blade surface using cotton swabs. Make sure to remove any remaining printing materials. |
Before replacing the covering, you can check the effectiveness of the roller scraper—see below.
To check the effectiveness of the roller scraper:
|
1.
|
Put on the cleaning gloves. |
|
2.
|
Wet a cloth with isopropanol. |
|
3.
|
Use the cloth to wet the bottom of the roller. |
|
4.
|
Turn the roller slowly with your hand. As the blade scrapes the roller, make sure the isopropanol is spread evenly over the entire length of the blade. |
|
6.
|
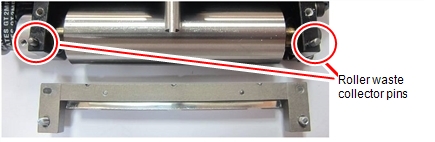
Before returning the roller waste collector to the print block, make sure that the pins are clean. |
To re-assemble the components:
|
1.
|
Return the roller waste collector to the print block and screw on the covering (see above). |
|
2.
|
Loosen the screws securing the suction tube. |
|
3.
|
Lower the suction tube so that the hole in the panel behind the tube is visible, and tighten the screws to secure the tube. |
|
4.
|
Attach the right-UV-lamp assembly to the print block and reconnect the UV power and fan cables. |

 Related Topics